Latest Entries »

Color Models


Color Models

Once model sheets are established, color models of the characters need to be created, defining not only the model sheet information but also the colors and possible textures required for the characterization. With 3D character design, this is much more obvious, but in 2D animation, the color models will not only define the actual colors that make up that character but can also define outline techniques, line quality (in terms of the thickness or thinness), any hand-rendered textures that may be laid over the basic fat coloring, or anything else that defines that character from a design and coloring point of view. At the Richard Williams Studio in the 70s and 80s there was no limit to the styles used for animated character design, whether that is traditional cartoon, “Roger Rabbit” molding, old book engraving styles, pencil-shaded rendering, woodcut hatching, or even old Master oil painting brush strokes. Each of these styles had to be defined in a color model form first, so each animator would know the required animation drawing style.


color modelsThe use of color is an important aspect of character design.It must be in keeping with the general design concept and fit comfortably with the rest of the design elements of the production. A multitude of psychedelic colors outlined by a heavy black line may not be what is required if the backgrounds are to be painted in delicate Chinese watercolor techniques. Color must also be used with care when targeting a specific audience. Designs using bright primary colors may be appropriate for a pre-school TV series but unsuitable for a darker piece aimed at an adult audience.


The practical use of color and the constraints upon production and distribution must also play a part in the design. Because the coloring of 2D classical animation can be a very major part of the production budget, the level of detailing and the number of colors used for a particular character must also be considered. The more colors you have and the more detailed a character is, the more costly the enterprise.


Color model sheets are generally used by the department dealing with paint and trace to ensure that all the individuals that color and shade the characters do so in line with the director’s instructions. Again, this can involve creating many different versions of color models to accommodate different costumes and different environments. A character dressed in the same clothing would look very different when seen in a brightly lit room than they would in an exterior moonlit scene or in the glow of a camp-fire. Digital paint and trace systems such as Animo, developed in 1992 by Cambridge Animation Systems, have replaced much of the work that was traditionally done on cels. Computer programs such as Animo are used not only to paint the artwork, but allow all manner of special effects to be achieved for a fraction of the cost and within a much tighter schedule than the traditional methods. They have done away with the need for messy paints and cels that were prone to scratching if mishandled, and required vast amounts of space to paint and leave to dry. This type of software also incorporates a system where by all the camera work hitherto undertaken on a rostrum camera is built in to the programme, enabling a full range of camera moves and effects to be achieved. The work is then rendered and output directly to a range of formats, including formats for the Internet, doing away with the need to shoot the footage as a separate activity. While the high-end professional software may remain outside the reach of many of us, there is now a range of affordable animation-specific software available for amateur animators.

Model Sheets

When designing a character for any particular animated medium (2D or 3D), the designer must consider what their design will look like from all angles and from all points of view. Although traditionally drawn animation essentially views everything with a two-dimensional view, one look at the very best of 2D character animation reveals that it is necessary to understand the character from numerous viewpoints, even for something as simple as an animated take or head turn. To ensure that the designer, the director, and the team of animators understand the full structure and nature of a particular character from all possible angles and perspectives, a character model sheet is created.


A model sheet is the blueprint of a character, defining its size, construction, and pro-portions. The model sheet traditionally must show the character from the three fundamental viewpoints—front, profile, and rear view—with sometimes a front three-quarter and a rear three-quarter view thrown in for good measure. A good model sheet will also define the head-height formula for that character and may even include close-up details of the character’s features, such as hands, mouth, and feet. There can often be more than one model sheet per character, depending on the amount of construction de-tail required by the production team. Additional model sheets might also show specific attitude poses of the character, its relative size to other featured characters, and even mouth positions for vowels and consonants if lip-sync dialogue is anticipated. With Hollywood-level movie productions, if might also be advisable to create 3D clay models of the main characters, so animators can pick them up and view their shape and form from every conceivable angle. Anything that familiarizes the animator with the character is valuable when designing an animation character.


model+sheet

The basic model sheet shows a character from all sides. This gives the animator a clear idea of the character’s form and any details of costume. These designs give a clear indication of the overall structure and proportions of an animated character seen in 360 degrees. They are designed specifically for use by animators in order for them to gain a clear understanding of the individual character’s ‘three-dimensional’ form.


When considering the structure and the anatomy of the animated character, simplification is the order of the day. It is necessary to break down a design into a form where it becomes possible to handle the character efficiently as animation. That’s where model sheets come in. Generally, the use of model sheets for animators is restricted to 2D classical animation, as they create every frame of the animation from scratch each time. While the need for model sheets in 3D stop-frame animation or computer animation may not be seen as such a great issue for the animators, as they are working with prefabricated models, they will certainly benefit from those model sheets and action sheets that illustrate the range and type of actions that a character is capable of. This can only enhance the performance that an animator gives.


Model sheets should contain all the relevant visual information the animators need. There should be no ambiguity at all within the drawing or the poses. Model sheets should illustrate the character in a simple pose giving, within separate drawings, details of front, rear and side views. This is just as important and useful as showing the character in a series of dynamic poses. The model sheet should enable the animator to gain a good understanding of what the character looks like through 360 degrees. Model sheets should always be clear, with any additional information added as notation.They should also provide all the detailing of costume and in some circumstances it may be necessary to create more than one such model sheet for a character if, for instance, the character changes costume within the film.


How to make my own cartoon character follow as below:


The KISS Principle

Keep it Simple, Stupid. As you’re not only going to have to build, but animate your character it pays not to go overboard on design. Try to keep your designs simple, elegant and above all workable.


Make your character Likable

No character should be fully “good” or fully “evil” – add some traits that contradict the main focus of the character.


Use familiar Visual Themes

A visual theme is a design thread that has familiar attributes running through everything in the animation. If your characters aren’t connected to the visual theme of your animation, it’s a lot harder for your audience to believe in them.


Give your Character Visual Appeal

Make your character interesting to look at. Doesn’t have to be pretty or beautiful, but no one will notice or remember a character that’s boring. In Shrek, even the supporting characters had visual appeal. The ogre-hunters and Robin Hood are two good examples.


Imperfections

No character should be perfect. Just as people are never perfect, neither should your characters be … perfect characters tend to come out as annoying and unrealistic … even superheroes have their problems and mental issues remember.


History

What happened to your character BEFORE he, she or it came to live in your head? What circumstances made them the way they are? What was their life like? This is also called “establishing” a character and is in evidence in Shrek by the use of the whole opening sequence (in a long case) and by the personality of Donkey’s owner (the short case)


Application

Use the force – the knowledge and thinking you have developed and used should be part of every character in your animation. An excellent main character will sometimes save a poor animation, but a good supporting cast will always help to create a good one. Remember to act out your character as often as possible, become as one with your creations.


Script writing

Screenwriting, also called script-writing is the art and craft of writing scripts for mass media such as feature films, television productions or video games.

123Screenwriters are responsible for researching the story, developing the narrative, writing the screenplay, and delivering it, in the required format, to Development Executives. Screenwriters therefore have great influence over the creative direction and emotional impact of the screenplay and, arguably, of the finished film. They either pitch original ideas to Producers in the hope that they will be optioned or sold, or screenwriters are commissioned by a producer to create a screenplay from a concept, true story, existing screen work or literary work, such as a novel, poem, play, comic book or short story.

The act of screenwriting takes many forms across the entertainment industry. Often, multiple writers work on the same script at different stages of development with different tasks.


Visual Design

The director works closely with the art director to develop concept art for all elements in the production. Working under the art director’s supervision, concept artists in the Visual Design department create multiple versions of these elements, which usually include characters, props, environments, and any asset that will need to be created during the production stage.

Visual designs are usually in the form of traditional sketches and paintings, as well as clay sculptures, often referred to as maquettes. These designs begin loosely and are refined over time, and turned into model sheets for the modeling and texture departments.


Developing a  Character

1. The KISS Principlekeep_it_simple

Keep it Simple, Stupid. As you’re not only going to have to build, but animate your character it pays not to go overboard on design. Try to keep your designs simple, elegant and above all workable.


2. Development

A strong main character is essential to an animated production. For your main character to be strong, you have to know them inside and out. This is where acting plays a huge part in animation. Think about things like:

  • How will your character react in any given situation?
  • How does your character move around?
  • How does your character interact with other characters and the environment around it?
  • What sort of character is it?
  • What are its goals and motivations?
  • What are the physical considerations you need to make? (Gravity, weight, mass, health, speed, height, weight etc)


Step 1:

Draw your way to fulfillment – the next step is rough character sketches, you should have some idea of your story from the brainstorming, and things to note here are that reference is always invaluable, the more reference you can get the better for you and your characters it will be. Get used to drawing your character and its parts over and over again, become familiar with the look and feel of your character, try different poses and actions. Make sure the character has a strong silhouette, a distinct solid black shape. This will make sure it can be seen over a background.


Step 2:

Start breathing some life – The aim in any animation should be the “Illusion of Life” you’re not just trying to make normally inanimate objects move, you’re attempting to bring them to life. You will need to make your character believable to your audience. As well as good, accurate motion, there are several other things you can give your character to help present the Illusion of Life

Stage 1: Pre-production

The pre-production stage is the process of preparing all the elements involved in a production and is the foundation of the project—the blueprint of the entire animation. The story and visual look of a project is developed at this stage, as well as the overall planning of the production. Any shortcuts taken at this stage of the game can directly affect whether a project will be a success or not.


Story

After the initial concept has been approved or decided upon, writers develop the story in the form of a script or screenplay. Story is critical. It’s my opinion that the success of Pixar films is directly influenced by the fact that it is a story-driven animation studio. The highest production values cannot save a project with an inadequate story. Without a solid story, there are only elements thrown randomly at the screen, leaving the viewer confused, bored, and in most cases, unsatisfied.

The story lives in the director’s head. A good director should have the entire movie already playing in the theatre of the mind, and the director’s job is, quite simply, to transpose what he sees in his mind onto the screen.


Idea Creation

images (3)

Ideas can arrive in an untold number of ways. They can come from a phrase uttered by someone in a conversation, from a line read in a book, newspaper, or magazine, from a picture or illustration you happen to glance at one day, or from an event or moment you experience in your daily life. Perhaps the latest novel you read or the magazine article you recently finished inspires you. You may have sketched a curious character who suggests a storyline to you, or maybe you just have a thought buzzing through your head that won’t go away no matter how hard you try.

You can even be inspired by another artist’s work, or a technique you saw in the last movie you watched, or a dream you had one night. Or the idea just popped into your head when you were using the restroom! Ideas can come from everywhere and anywhere. Life speaks to us constantly. We just have to have our eyes and ears open to it when it does so.


Evolving a Story line

Ok, so let’s say you’ve navigated the potentially treacherous and turbulent waters of intellectual copyright and its inherent dangers of plagiarism and you’re ready to move on. The next stage is story line  Whether you are making a film, a TV program, a computer game, or even a Web site movie, you will now need to progress your basic idea into a story line that an audience or player can identify with. The very best story lines tend to contain three essential elements: set-up, and resolution.

In the set-up stage, you introduce your audience to the setting, characters, and circum-stances of your story. Unless the opening of your story line is deliberately conceived to shock, deceive, or confuse, the audience needs to be introduced to the world you are about to take them into. All the parameters of your story line are set at this stage.

The conflict stage in your story line is often the point where things start to go wrong for the characters. Characters might behave out of keeping with what we believed them to be, or our hero character may suddenly be threatened by unexpected, or out of control, events around him or her. Perhaps a new character or another form of disruptive element is introduced to the plot, which turns the entire status quo of the story upside down. Whatever the cause, a definite conflict materializes something significant enough to turn our cosy, established world, or its way of being, entirely upside down.

As implied by its name, the resolution stage is the point of the movie (invariably the end of the movie but not always so) when the conflict we have introduced comes to a climax and is resolved in one way or another. This can give us a happy ending, a sad ending, or an ending that leaves audiences wondering. But it does need to resolve the story line we have established in the first two stages so the audience feels some kind of satisfaction that the outcome is as it should be. The only exception to this would be in a series, where you deliberately leave the audience hanging, wanting more.

Production Pipeline

 Production Pipelines


Stages of Production

Depending on the nature and scope of the project, you need to decide the path and schedule that the production will follow from the initial idea to the finished product. This is called a production pipeline.

You can liken a production pipeline to a car assembly line.   It optimizes   production by arranging tasks in a specific order and so that they may be completed before moving on to the next stage. Going back and forth between stages can delay production, leading to a potential missed deadline and blown budget, both of which are frowned upon by all players involved.

A production pipeline for most projects can be broken down into three stages: pre-production, production, and post-production.

These stages are then distributed among several departments, depending on the type of project and what the final delivery method is. No two studios have the same process, but the following are common departments for animation


  •             Story
  •             Visual design
  •             Storyboard
  •             Edit
  •             Audio
  •             Modeling
  •             Scene  setup
  •             Texturing
  •             Rigging
  •             Animation
  •             Effects
  •             Lighting
  •             Rendering
  •             Compositing

If you’re the only person working on a project, you are responsible for carrying the workload of all departments for all three stages of production. Larger projects require the collaboration of multiple players, blending the talents and skill sets of the team to produce what would otherwise be a daunting task for an individual. It’s important to note that no matter the size of the team or project, you will need a strong production pipeline.

Although every project will go through all three stages of the production process, not every project that you generate digital models for will require all components. A 3D print graphic may not require rigging and animation, for example, whereas real-time 3D games typically do not require the rendering and compositing of image files.


This image shows the stages of production pipeline

production Pipe Line


Some New Principles for the Digital Age

 At this point in the talk, Kerlow indicated that the 3D animation industry may need some additional principles, for areas that weren’t relevant in Walt Disney’s time. He suggested the following:


1. Visual Styling

images

 This refers to the importance of developing a look that is feasible to produce at all levels of production. Anime, for instance, makes heavy use of the “language of cinema” to tell its stories, with many visual FX and camera movement, but often little in the way of animation. Kerlow showed parts of The Ghost in the Shell to demonstrate.


 2. Blending Cartoons w/ Real World

images (2)

 With modern technology, we can blending together many different sources of motion. The key, especially with motion capture, is to add intention to physical performances, so that a clear motion style emerges in the mocap data. Without intention, motion capture will make for characters that lack any defining style of movement – a problem that manifested in the static (non-action) scenes of Final Fantasy: the Spirits Within.


3. Cinematography

 With 3D animation packages, we now have absolute control over camera and lighting conditions in a scene. Mastering these two aspects of production can lead to scenes that are visually very powerful. (Example: the “roller coaster” scene from Monsters, Inc. The scene was largely effective because of skillful camera animation.)


4. Facial Animation

images (1)

 Animators must determine what level of facial control and facial animation styling will work for the various levels of production. Kerlow suggested building a reusable catalogue of facial morph target, similar to extant libraries of walk and run cycles, with particular attention paid to eye animation close-ups.


5. Interactive Control

 Unique to the game industry, this principle refers to the effective integration of animation with interactivity. Important points to focus on are walk cycles, building of anticipation, creating built-in character intelligence, and setting up reaction shots.

Kerlow concluded by stating that using these animation principles will allow people in the industry to create increasingly believable characters, and increasingly believable situations in which to put them. As has been the case with traditional animation for the past seventy years, planning and directing with the twelve (or seventeen) principles in mind will allow for efficient character creation at every level of production.


6. The KISS Principle

Keep it Simple, Stupid. As you’re not only going to have to build, but animate your character it pays not to go overboard on design. Try to keep your designs simple, elegant and above all workable.


7. Development

A strong main character is essential to an animated production. For your main character to be strong, you have to know them inside and out. This is where acting plays a huge part in animation.


8.Application

Use the force – the knowledge and thinking you have developed and used should be part of every character in your animation. An excellent main character will sometimes save a poor animation, but a good supporting cast will always help to create a good one. Remember to act out your character as often as possible, become as one with your creations.

 12 Principles of Animation


Applied to 3D Animation

In the early 1930s, Walt Disney and company sat down to codify the hand-drawn animation process that had been informally evolving at Walt Disney studios. What emerged became known as the “12 Principles of Animation,” and set the standard for hand-drawn animation.

At Saturday morning’s “The 12 Principles of Animation applied to 3D Animation,” Isaac Kerlow, Director of Digital Production at the Walt Disney Company, argued that the principles need to be adapted for the modern day. Using visual examples from well-known animated films, Kerlow reinterpreted the twelve principles as they would apply to 3D animation, and added a few new ones of his own.

The purpose of adapting the principles, Kerlow said, is to guide the development of 3D animation, a relatively new art form. Computer animation is very complex, and a well-understood framework can help artists and producers weave together the many separate aspects of character and scene creation, into an animated tapestry that will truly captivate an audience.

For each of the following twelve principles, Kerlow defined the intention of the principle, presented a visual example to back it up, and suggested a modern equivalent that would apply to character artists working in 3D.


1. Squash and Stretch


2389444869_d0f16fd9a6crop

 Original idea: In traditional animation, characters movements (particularly facial movements) had a very high degree of exaggerated, non-rigid deformation. (Imagine any Disney character whose face contorts wildly during a sneeze or a scream.)

Modern equivalent: The principle still holds in the 3D era, especially for cartoon-like animations. (Anime tends toward exaggerated subtlety.) Squashing and stretching happen within animation packages, using dynamics weighting or unusual IK systems.


 2. Anticipation

anticipation1

Original idea: Anticipation is the technique by which the audience’s eyes are drawn to where action will occur on-screen (e.g. a cartoon that begins making running motions before actually going anywhere). Anticipation announces the coming surprise and is a very useful technique for guiding expectation. (Again, Disney animation tends toward heavy anticipation, whereas in anime we see very little — given anime a more etheric, fantastic feel.)

Modern equivalent: Anticipation can be created by the skillful use of motion curves, expanding or contracting pieces of animation to create the anticipatory effect.


3. Staging

images (2)

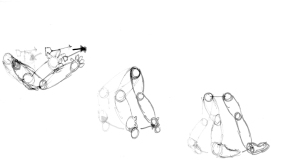
Original idea: Staging refers to the way in which character motion and camera movements are set up to convey the mood and intent of a scene. (Example: in Toy Story, Buzz Light year’s arrival in the bedroom is shown with a close-up that begins at his feet and pans dramatically upward to his helmet.)

Modern equivalent: In 3D, staging can be expanded to include more detail, hide points of interest, set up for chain reactions, and so on. Staging is also useful in animistic, which establish a scene’s core movements before primary animation gets underway. Contemporary moving image techniques, such as 3-axis camera moves, slow motion, “bullet time,” and so on, also add to 3D staging abilities.


4. Straight Ahead  or Pose-to-Pose

extremos-427x311-custom

Original idea: In traditional animation, character actions were either drawn from beginning to end, creating an unpredictable look and feel, or they were broken down into a more predictable set of key poses.

Modern equivalent: In 3D animation, straight ahead animation corresponds to procedural animation techniques (e.g. motion capture and 3D rotoscoping); pose-to-pose would correspond to key frame animation. Modern artists can take advantage of layers or channels to intelligently mix both types of motion, or use non-linear motion curve editing to edit different aspects of a single character’s motion.


5. Follow-Through and Overlapping

1

 Original idea: Follow-through refers to the reactive animation that occurs after an action is completed, telling the audience how the character feels about that action. (Think of Donald Duck throwing a football, watching it for a moment, and then lowering his arm in disappointment.) Overlapping refers to the additional motions that overlap the main motion of a given character.

Modern equivalent: Follow-through can be done with dynamic simulation and scripts – especially for cloth and hair. Overlapping is achieved by using layers and channels to blend different types of motion into a sequence.


6. Slow-in and Slow-out

images (3)

 Original idea: If you look closely at movies animated in the Disney style, you’ll see that characters’ motions tend to be quicker in the middle of an action than at the beginning and end. This slowing of the intro and extra sections of a movement creates a “snappy” effect.

Modern equivalent: Fine-tuning animations using time-editing tools, such as dope sheets, curves, and timelines. Motion capture performers can also be directed to do slow-ins and slow-outs.


7. Arcs

face2

Original idea: Organic characters almost always move in motion arcs, as opposed to straight lines. Straight line motions make a character look sinister, robotic, or restricted in some way. (In The Iron Giant, the giant begins the movie with linear movements, and adopts arc-based motion as he becomes “more human” later on.)

Modern equivalent: In 3D packages, motion can easily be constrained to arcs. Motion capture performances can also be fine-tuned using arc editors.


8. Secondary Action

27-03-2011-5-52-221

 Original idea: These are small complementary motions that occur in a scene.

Modern equivalent: Using layers and channels to build up different aspects of secondary motion. Collision detection is another useful tool for generating secondary actions.


9. Timing

timing-and-spacing

Original idea: Timing refers to the precise moment at which a given character motion occurs, and how long it continues for. (Humor is often created through the use of clever timing juxtapositions.)

Modern equivalent: In 3D animation, timing can be refined using the time-editing tools, and frames can be easily added or removed to make the timing work. Using different animation tracks for different character (and sub-tracks for parts of characters) also helps create precise timing.


10. Exaggeration

exaggeration

Original idea: The essence of an action is often enhanced by the exaggeration of a given motion – especially for cartoon-style animation. (Eyes bugging out, jaws dropping, etc.)Modern equivalent: In 3D, this can be done at the performance level, using procedural techniques, and can also be worked into cinematography and editing.


11. Solid Drawing

Henpecked Hoboes-2

 Original idea: Originally, this principle referred to using appropriate weight, depth and balance to give drawings the desired look.

Modern equivalent: Kerlow suggested renaming this principle “Solid Modeling and Rigging,” since the same principles now apply to the optimization of models and IK skeletons to create specific “animation personalities” for different characters.


12. Characters’ Appeal

images (4)

 Original idea: The last of the twelve principles suggests that characters be well-developed, with interesting and distinct personalities.

Modern equivalent: In 3D animation, character complexity and consistency can be dramatically increased – and built in to a character’s design – so that appeal is not being recreated from scratch with every set of drawings. Kerlow pointed out that in gaming, walk and run cycles are especially important aspects of a character’s appeal. He showed a clip from Kingdom Hearts in which Sora, Donald, and Goofy are walking side by side, each with their own distinct style.
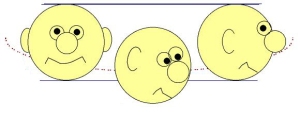
Stop Motion Photography

Stop-Motion Photography

Stop-motion (also referred to as stop-action) photography was one of the first “special effects” techniques ever invented. It is a form of animation and allows otherwise lifeless objects to move and change. Much of the early use of stop-motion in the cinema was to make models of dinosaurs apparently gallop by themselves. Stop-motion continues to be used today in commercials (like the singing California Raisins) and children’s fantasies like Rudolf the Red Nosed Reindeer.

Movies and television work by displaying to the viewer a series of pictures. Each picture is identical except for the action that is changing in the scene. If the images are flashed up fast enough around ten a second the brain will see them as a single picture with moving elements. This effect is known as persistence of vision. Motion pictures are usually projected at 24 frames a second and video at 30 frames a second (although this comes in the form of two interlaced half frames every 60th of a second).

kong sex violenceMotion picture cameras record by exposing frames (24 a second) one after another so that movement, like a person walking down a street, is captured. If the camera is pointed at an inanimate object, like a vase on a table, and the frames are exposed one at a time so that in between shots the vase can be moved a fraction of an inch, then film when projected back at normal speed, will show the vase apparently moving by itself. The same can be done with elaborate jointed models on miniature sets to give the impression that the models are alive and walking around by themselves. In addition to models, clay and drawings are often used with this technique. When drawings are used it is generally referred to as cartoon animation.

One of the earliest shorts produced using stop-motion was The Missing Link. Willis O’Brien, a pioneer of stop-motion, completed this comedy in 1916. O’Brien went on to later do the stop-motion for The Lost World in 1925. His most well-known work was King Kong (1933). O’Brien’s work inspired a new generation of stop-motion artists including Ray Harryhausen (left). Harryhausen worked on dozens of films animating everything from dinosaurs and dragons to an army of sword-fighting human skeletons for the film Jason and the Argonauts. Harryhausen was the premier stop-motion animator of his day, and his name on the film was every bit as important a draw as the lead actors.

Stop-motion photography requires long hours of hard work to produce even a few seconds of film. A single error can cause many days worth of material to be lost. For this reason, the camera, set and models are carefully clamped down to eliminate unexpected movement between shooting each frame. In King Kong, much of the miniature foliage was actually made out of metal to keep it rock steady.

Kingkong02The Kong crew ran into trouble while filming one sequence when a live primrose plant, used in a jungle scene, went into bloom one day during filming. Nobody noticed this until the film was developed and viewed. In the background appeared a perfect time-lapse sequence of a white flower opening. The entire scene, a day’s work, had to be re-shot.

The Kong crew also ran into trouble with the rabbit fur that covered the eighteen-inch-high Kong model used in the production. As the animators adjusted the Kong model in between shooting frames, their hands disturbed the hair. The producers of the film were appalled when these showed up as obvious ripples on the head and shoulders of Kong during an important screening for studio executives. Fortunately one of the VIPs cried out in excitement, “Hey, Kong is mad! Look at him bristle!”

Since producing stop-motion sequences were so labor intensive and expensive, animators often had to find unique ways to cut costs during production. Ray Harryhausen, while filming It Came From Beneath the Sea (right), the saga of a giant irradiated octopus that ate San Fransico, was forced to reduce the number of arms on the octopus model from eight to six to help keep the picture on budget. Harryhausen also came up with a split-screen process that allowed the stop motion models to be placed in scenes with real buildings and people. This lowered the costs of producion and made the action seem more realistic. Harryhausen called this process Dynamation.

Despite the careful work of artists, like Harryhausen, stop-motion photography had some inherent limitations. One of the most important is its inability to accurately represent quick motion. When a man runs by a camera during traditional filming, his movement is quick enough to cause a blur on each frame. An animated dinosaur running by the camera will not blur because each frame is a photograph of a still model. Our eyes can perceive the difference and stop-motion dinosaurs which are running will always seem to move in a staccato fashion. George Lucas tried to solve this in Return of the Jedi, through a method he called go-motion. It involved filming a puppet at high speed. Because the action was not stopped a proper blur was recorded, but since the monster puppet was being photographed in real-time, it was limited in the actions it could perform.

jurassic-park-t-rexComputer animation has now replaced stop-motion in almost every application where the film maker is trying to create a realistic effect. In computer animation the model is constructed within the memory of the computer. This allows the model to be more versatile and detailed. The computer can also blur frames to simulate movement and it is easy to go back and make changes in the middle of a scene, something that was impossible with the older stop-motion method. Computer animation is so effective that in the film Jurassic Park it is impossible to tell the full-sized dinosaur puppets from the computer-generated animals.

Stop-motion isn’t completely gone, however. Sometimes film-makers prefer it because of the special style it gives the picture.

For cameras click this http://bit.ly/1wwDU7p

Stop Motion Animation Process

STOP MOTION ANIMATION PROCESS

Stop Motion Animation is the cinematic process by which an armatured, poseable puppet is brought to life on screen by breaking up the figure’s motion into increments and filming one frame of film per increment. When the final film is projected, the puppet appears to move of its own volition. Anyone who is familiar with the films of Willis O’Brien, Ray Harryhausen, Jim Danforth, David Allen and others have experienced the process at work. The Pillsbury Doughboy and Hamburger helper were created using Stop Motion Animation (Their more recent incarnations are being put through their paces using computer graphics).

Stop MotionWillis O’Brien’s technique comprised mainly of building miniature settings and animating his puppets within them. For many scenes, if humans needed to be present, he ingeniously integrated rear projection screens into his miniatures and hidden projectors would project the live action clips one frame at a time. King Kong brilliantly demonstrates the use of this system. The process, however, became a bit prohibitive in cost.

Ray Harryhausen needed a way to integrate his creatures into settings without the need to build many elaborate miniature sets, the reason for this being that the film he was scheduled to work on, The Beast from 20,000 Fathoms, had a miniscule budget. He finally devised a process of his own, which is still used today, the split-screen rear projection system.

This process consists of shooting locked down plates in which to incorporate the model(s). The plate is projected onto a rear screen and a wooden frame holding a removeable sheet of glass is placed in front of it. Mr. Harryhausen would then calculate where the creature was going to appear. If the creature needed to appear behind a series of buildings, he would break the plate up along this line, eventually blocking off half of the image. Let’s say he blocks off the botton half of the plate first using black paint on the glass. (this will prevent that section of the film in the camera from being exposed). He then places the model between the sheet of glass and the rear screen and he aligns it so it will appear to be behind the buildings. When he looks through the lens of the camera, he’ll see the top half of the plate, the partially obscured dinosaur and an irregularly (in this case) shaped mask covering the inferior portion of the frame. He will then proceed to animate the model and when finished he will replace the sheet of glass in the frame with it’s exact opposite. A black mask will be covering the top portion of the image. Mr. Harryhausen will then complete the process by rewinding the film he shot and reexposing it, but only filming the bottom half of the plate on this pass. When developed and projected, the creature will appear to be incorporated into the background plate. Needless to say, this process saved time and money and created a totally realistic effect and all in-camera. And for those who are familiar with Mr. Harryhausen’s work, he named the process Dynamation for most of it’s use and Dynarama on The Golden Voyage of Sinbad.